Rode surprised the podcast world with the Rodecaster Pro.
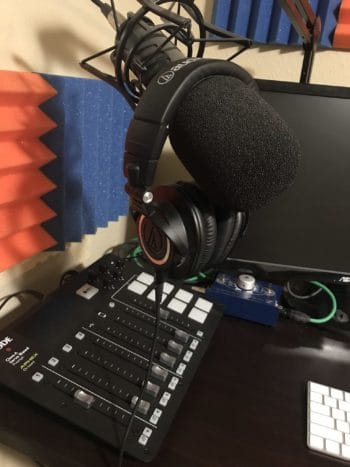
For a company mostly known for making high-quality microphones, they have really thought things through with the new Rodecaster Pro.
Their recent entry into interfaces and mixers with the Rode AI-1 USB audio interface was the first hint that they were going be investing in a new segment…
But I don’t think anyone would have guessed this would be the follow-up!
There are a ton of features – both visible and “hidden” in the touchscreen display.
If you want to watch a short (6 minutes or so) overview, take a look at the video below:
If you want to purchase one, I recommend ordering quickly (even if it’s not in stock) so you can hold your place in line.
These things are going quick!
So what’s all the hype is about? What’s so special?
One of the big benefits is that everything you need (and then some) is combined in one unit:
- Mixer / Audio Interface (4 XLR inputs)
- Individually-controlled Phantom Power
- Bluetooth in and out (I/O)
- TRS I/O
- USB I/O
- 4-channel Headphone Amp (and a cable to connect it)
- Soundboard (8 pads)
- Aphex Exciter (4 channels would cost you $700)
- Compressor / Noise Gate / High-pass Filter / De-Esser
- Save to SD Card
Basically, the Rode Rodecaster Pro is an all-in-one podcast studio that will record to a computer and SD card, automatically improve sound quality, lets you record phone calls, add in one-touch sound effects, and more – all in one relatively compact device.
We’ll go into detail on most of these below:
Rodecaster Pro Device
The top of the device is pictured above, but here’s a bit more detail:
There are 4 individual headphone controls and volume control for your speaker output if you use one. They each have a nice clicky/stepped feel:
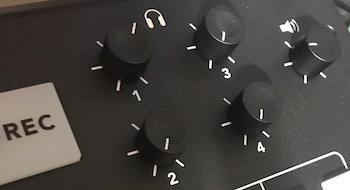
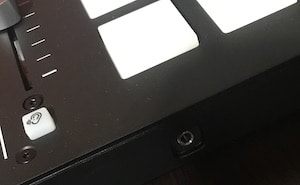
On the front of the Rodecaster Pro is one 3.5mm headphone jack for channel 1. The back has four 1/4″ inputs.
Below that are the customizable soundpads:
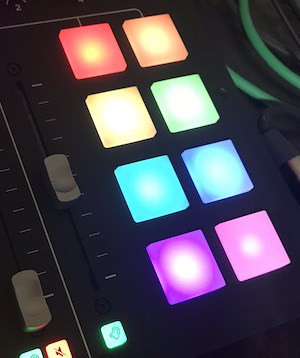
You can transfer sounds from your computer to any of the pads, or you can record anything into the pads from the settings screen. I’ll show you that a little later.
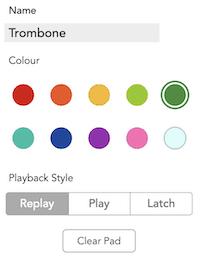
So you know, there are different options for how the buttons work:
- Replay starts over on every button press and can’t be stopped
- Play starts on a button press and can’t be stopped
- Latch starts on a button press and stops on a button press
Each pad can have a unique setting and no matter what setting you use, you can still control the volume with the slider.
Under each channel’s fader are solo and mute buttons. You can select multiple channels at once and the only channel that doesn’t have a mute button are the soundpads.

Moving to the back of the mixer are all the inputs. I mentioned them up top so no need to repeat everything.
There is plenty of room for everything and it doesn’t feel crowded at all.
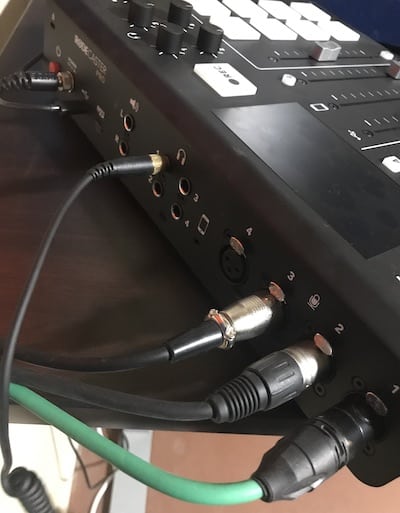
One nice little touch is that the power cable screws in so you can’t accidentally pull it out.
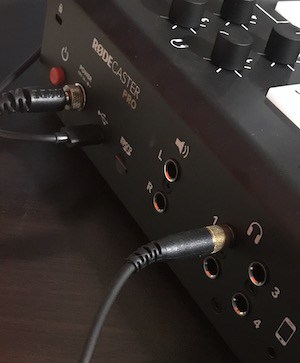
And when you hit the power button (purposefully or accidentally), you and prompted with this screen to confirm:
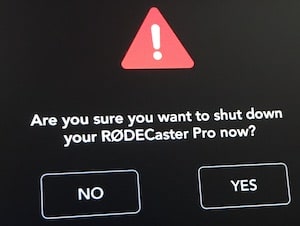
No lost recordings with the Rodecaster Pro!
Rodecaster Pro Settings
Now let’s dive into the touchscreen and all the options it has.
From the “home” screen, when you touch the gear/setting icon you’ll see this:
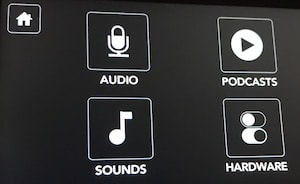
The audio button leads to a screen that lets you choose which channel you’d like to adjust:
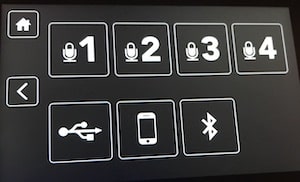
Channel Settings
Starting with Channel 1, you get 3 main tabs (plus the advanced screen).
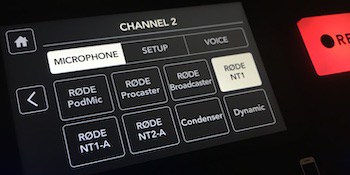
The microphone tab lets you choose from built-in options for popular Rode microphones (check out the PodMic here) as well as generic condenser and dynamic mic settings:
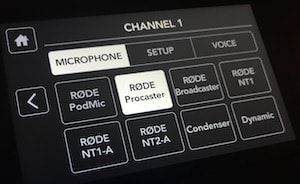
Each one you select actually controls phantom power and input level automatically – really smart move:
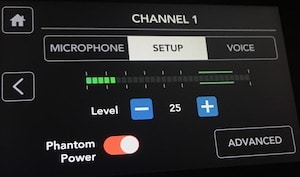
Note that the Procaster is a dynamic mic and doesn’t need Phantom Power but I use a Cloudlifter Z so I turned that on and lowered the input level.
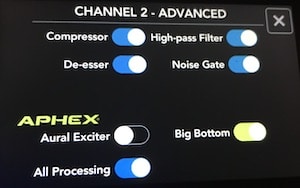
The somewhat hidden advanced screen is where you get a ton of value:
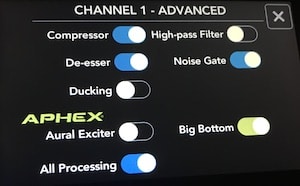
All the settings here are automatic and from my testing work extremely well.
Options like the Noise Gate are adjusted by the voice tab (making it more or less sensitive based on the strength of your voice), although that’s not clear without watching a specific Rode video. Something most people won’t do.
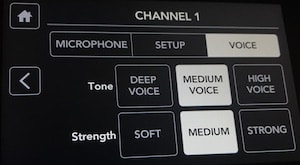
Channel 2-4 are more of the same, but don’t have the Ducking option.
Phantom Power is set individually for each channel as well, which many mixers and interfaces of this size don’t let you do.
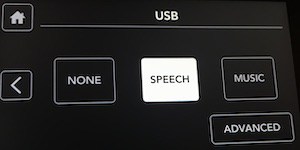
The USB input has a more simplified screen for None, Speech, and Music:
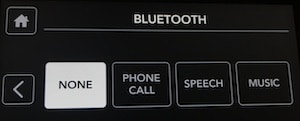
The TRS Smartphone and Bluetooth input have similar options, but also include a Phone Call setting:
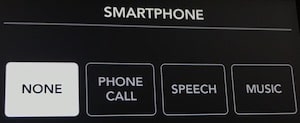
One thing to note here is that there is automatic mix-minus for phone calls, which means that your phone guest will hear the conversation like a normal phone call.
Without mix-minus, they would hear a delayed echo of themselves and that’s extremely distracting and unprofessional. Well done!
Podcasts Screen
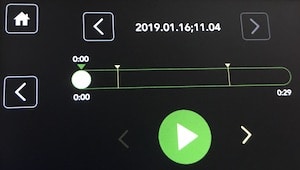
The Podcasts page is where you can listen to podcasts recorded to the SD card.
The top two arrows let you change which recording to play.
Those little lines white lines are Markers and you can skip between them with the forward and back arrows next to the play button.
You can also drag the playhead circle to wherever you’d like.
Simple but powerful.
Sounds Screen
The Sounds screen lets you record directly from the device into the sound pads (no computer needed) and also shows you the name in case you need a refresher:
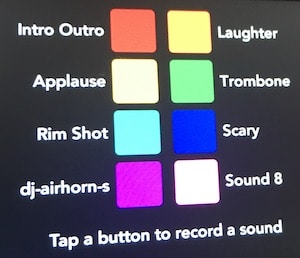
Like it says, just tap one of the colors and hit the “Record” button to save over that pad:
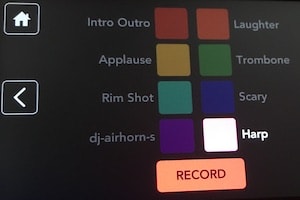
I think it would be nice to be able to adjust the above-mentioned “Play, Replay, Latch” options right from the device, but that’s a minor thing and most people will have a computer to change those settings.
Hardware Screen
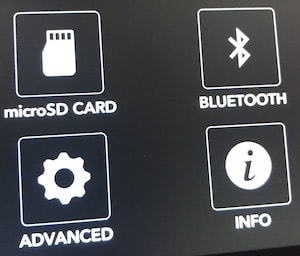
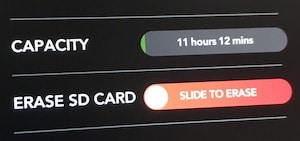
The Hardware setting lets check and erase the microSD card:
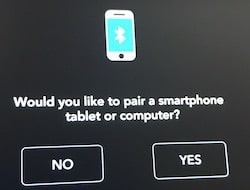
Pair a Bluetooth device:
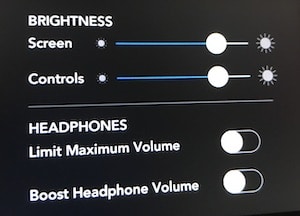
Advanced lets you adjust brightness and headphone output options:
Recording Screen
The “home” screen and the Record screen look similar.
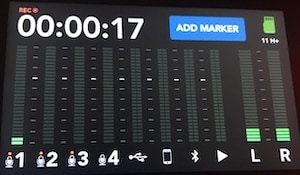
When you hit the big red Record button, you’ll see “Rec” in the top left along with a timer and “Add Marker” button:
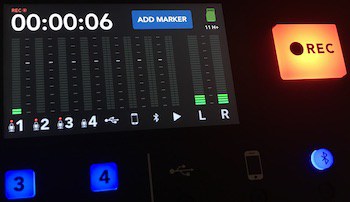
The input levels are clear and easy to monitor at a glance.
If you look closely you’ll see channels 1, 2, and 3 have a red dot above the microphone. That means Phantom Power is enabled for those channels.
All these little touches make for an excellent user experience and Rode delivered an impressive product with their first mixer.
They’re planning a software update this month (February 2019) to add multi-track recording too.
Our Rating: 4.9/5
Who should not get the Rodecaster Pro?
These aren’t necessarily deal-breakers, but here are some things to consider…
Solo podcasters
It works great for a solo podcast, but I think it’s overkill for many.
Rode was nice enough to send me one, otherwise I probably would have just stuck with a USB audio interface.
Where it really shines for solo podcasters is if you also do live-streaming and want the ability to easily mix on-the-fly.
Podcasters that need multi-track editing capabilities
Update: This feature has been released in a recent update! Note: for now, multi-track recording is only available via USB.
I don’t know for sure, but I believe there is a good chance that Rode comes out with a software update to enable multitrack recording.
Most audio mixers with this number of inputs don’t have multitrack recording either, but it would definitely be useful for podcasters.
Hosts and producers of multiple podcasts (maybe)
One suggestion I’ve seen is that people would like to have multiple podcast profiles for the sound pads.
That would let you easily switch between multiple “sets” of prerecorded sounds for different shows.
It’s a minor thing and you could easily just use 4 pads for one show and 4 pads for another show, for example.
I could easily see Rode updating the software to include this functionality as well.
